Build your own web proxy with Glype and Heroku
I’m living in a country in which government censorship is used to protect the people from reality :)) So at times, I often come across some “sensitive” pages totally blocked by the ISPs. It’s not difficult to bypass the restriction. You have many solutions out there: using HTTP proxy servers, web proxy services, VPN…
The problems with online web proxies is that they are full of ads, which is rather annoying. HTTP proxy servers are not reliable: they may be up or down at anytime, and maybe blocked by the ISPs. For VPN, SSH tunneling, you may need to pay for the service or server (if you intend to setup your own server), or at least you need to make some modifications to the system or browser settings to make it work. In my case I just wanted a simple way just to read my favorite articles, blogs, and I came up with one: Setting up my own web proxy with Glype and Heroku. They are free to use.
Update: Recent version of Glype (1.4.13) seems to restrict its installation on your own domain only (like www.your-domain.com). It won’t work on Heroku anymore (because your application’s domain is deployed as something like `myapp.herokuapp.com`). So you may need to find its earlier versions that works. For example, 1.4.6.
Prerequisites:
You need the followings installed on your computer before we begin:
Git: Git is used so that we can “push” our PHP source code (Glype) to Heroku. Find out how to install Git for your Operating System here: https://help.github.com/articles/set-up-git
PHP: This is used to set up Glype on our machine. Then we’ll push the code to Heroku.
Heroku Toolbelt: For interacting with Heroku from the command line.
Let’s start!
1. Register for a Heroku account If you don’t have a Heroku account yet, register for one first. It’s free and no credit card required for registration.
2. Download Glype from https://www.glype.com/download.php. Save the file to somewhere.
3. Login to Heroku using your Heroku account:
$ heroku auth:login
Enter your Heroku credentials.
Email: minhdanh@***.com
Password (typing will be hidden):
Authentication successful.
4. Generate your SSH keys (Again, if you don’t have one yet)
$ ssh-keygen -t rsa
Generating public/private rsa key pair.
Enter file in which to save the key (/Users/minhdanh/.ssh/id_rsa):
Enter passphrase (empty for no passphrase):
Enter same passphrase again:
Your identification has been saved in /Users/minhdanh/.ssh/id_rsa.
Your public key has been saved in /Users/minhdanh/.ssh/id_rsa.pub.
The key fingerprint is:
a6:88:0a:0b:74:90:c6:e9:d5:49:d6:e3:04:d5:6c:3e [email protected]
Then upload your public key to Heroku:
$ heroku keys:add
Found the following SSH public keys:
1) id_boot2docker.pub
2) id_rsa.pub
Which would you like to use with your Heroku account? 2
Uploading SSH public key /Users/minhdanh/.ssh/id_rsa.pub... done
5. Setting up Glype on our machine:
Extract the downloaded file:
$ mkdir ~/Projects/glype
$ cd ~/Projects/glype
$ mv ~/Downloads/glype-1.4.6.zip .
$ unzip glype-1.4.6.zip && rm -f glype-1.4.6.zip
Then fire up a web server to run our source:
$ php -S localhost:8080 -t .
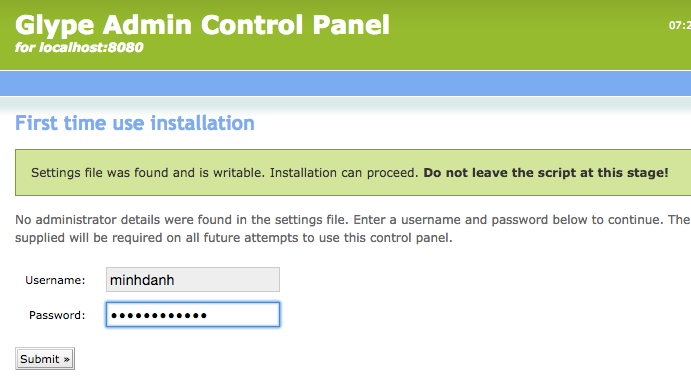
Now open your browser and visit http://localhost:8080, Glype should show up:

Enter your desired username and password. Then you will be redirected to the administration page of Glype, where you can change the default settings.
6. Push our source code to Heroku
Initialize a new Git repository:
$ git init
Initialized empty Git repository in /Users/minhdanh/Projects/glype/.git/
Then create a new Heroku app (You should replace `anti-censorship` with other name):
$ heroku create anti-censorship
Creating anti-censorship... done, stack is cedar-14
https://anti-censorship.herokuapp.com/ | https://git.heroku.com/anti-censorship.git
Git remote heroku added
And do the first commit:
$ git add .
$ gc -m "First commit"
[master (root-commit) 5abc8b8] First commit
37 files changed, 9896 insertions(+)
create mode 100644 INSTALL.txt
create mode 100644 LICENSE.txt
create mode 100644 admin.php
create mode 100644 browse.php
create mode 100644 cookies.php
create mode 100644 disclaimer.php
create mode 100644 edit-browser.php
create mode 100644 glype-1.4.6.zip
create mode 100644 includes/init.php
create mode 100644 includes/main.js
create mode 100644 includes/parser.php
create mode 100644 includes/process.php
create mode 100644 includes/settings.php
create mode 100644 index.php
create mode 100644 player.swf
create mode 100644 plugins/facebook.com.php
create mode 100644 plugins/google.com.php
create mode 100644 plugins/hotmail.com.php
create mode 100644 plugins/live.com.php
create mode 100644 plugins/msn.com.php
create mode 100644 plugins/myspace.com.php
create mode 100644 plugins/twitter.com.php
create mode 100644 plugins/yahoo.com.php
create mode 100644 plugins/youtube.com.php
create mode 100644 plugins/ytimg.com.php
create mode 100644 robots.txt
create mode 100644 themes/default/README.txt
create mode 100644 themes/default/authenticate.page.php
create mode 100644 themes/default/banned.page.php
create mode 100644 themes/default/config.php
create mode 100644 themes/default/framedForm.inc.php
create mode 100644 themes/default/main.php
create mode 100644 themes/default/sslwarning.page.php
create mode 100644 themes/simple/README.txt
create mode 100644 themes/simple/config.php
create mode 100644 themes/simple/main.php
create mode 100644 tmp/.htaccess
Finally, push it:
$ git push heroku master
Counting objects: 45, done.
Delta compression using up to 4 threads.
Compressing objects: 100% (43/43), done.
Writing objects: 100% (45/45), 472.10 KiB | 0 bytes/s, done.
Total 45 (delta 12), reused 0 (delta 0)
remote: Compressing source files... done.
remote: Building source:
remote:
remote: -----> PHP app detected
remote:
remote:  !     WARNING: No composer.json found.
remote:        Using index.php to declare PHP applications is considered legacy
remote:        functionality and may lead to unexpected behavior.
remote:
remote: -----> No runtime required in composer.json, defaulting to PHP 5.6.6.
remote: -----> Installing system packages...
remote:        - PHP 5.6.6
remote:        - Apache 2.4.10
remote:        - Nginx 1.6.0
remote: -----> Installing PHP extensions...
remote:        - zend-opcache (automatic; bundled)
remote: -----> Installing dependencies...
remote:        Composer version 1.0-dev (3470cef1f1294802bdc2885e152d28537f643828) 2014-01-04 14:44:34
remote:        Loading composer repositories with package information
remote:        Installing dependencies
remote:        Nothing to install or update
remote:        Generating optimized autoload files
remote: -----> Preparing runtime environment...
remote:        NOTICE: No Procfile, using 'web: vendor/bin/heroku-php-apache2'.
remote: -----> Discovering process types
remote:        Procfile declares types -> web
remote:
remote: -----> Compressing... done, 72.1MB
remote: -----> Launching... done, v3
remote:        https://anti-censorship.herokuapp.com/ deployed to Heroku
remote:
remote: Verifying deploy... done.
To https://git.heroku.com/anti-censorship.git
 * [new branch]      master -> master
As you can see, the app is pushed and deployed on Heroku automatically. Now it is the time to check out our work:
$ heroku open
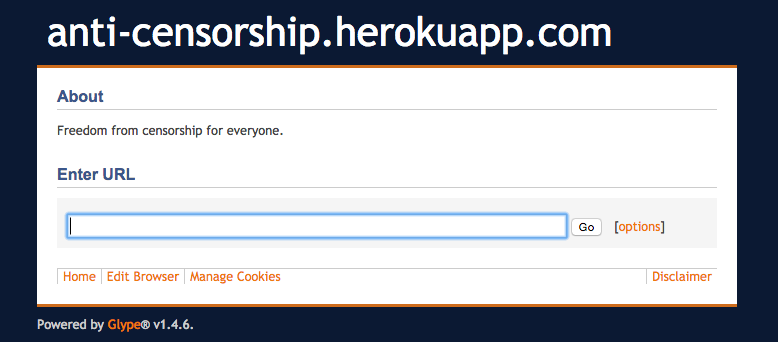
This will open the deployed app on your browser:

And you’re welcome to the open and wild Internet again :)